featured image for different types of plumbing systems

What Are the Different Types of Plumbing Systems?

When it comes to your home or business, plumbing is more than just pipes and water pressure. It’s the invisible network that keeps everything flowing, from your kitchen faucet to your shower drain. And, lucky for you, if you’ve ever wondered, “What are the different types of plumbing?” — you’re in the right place!

Understanding the many forms of plumbing systems can help homeowners and business owners alike know what to expect during repairs, renovations, or routine maintenance. At Henrik Plumbing, we offer expert plumbing and drain cleaning services to help you handle any type of plumbing your property might need. But first, let’s dive into the different categories and what makes each one unique.

What Are the Different Types of Plumbing Systems?

There are three primary plumbing systems you’ll find in most buildings. Each plays a specific role, and all are essential to keeping your space functional and sanitary.

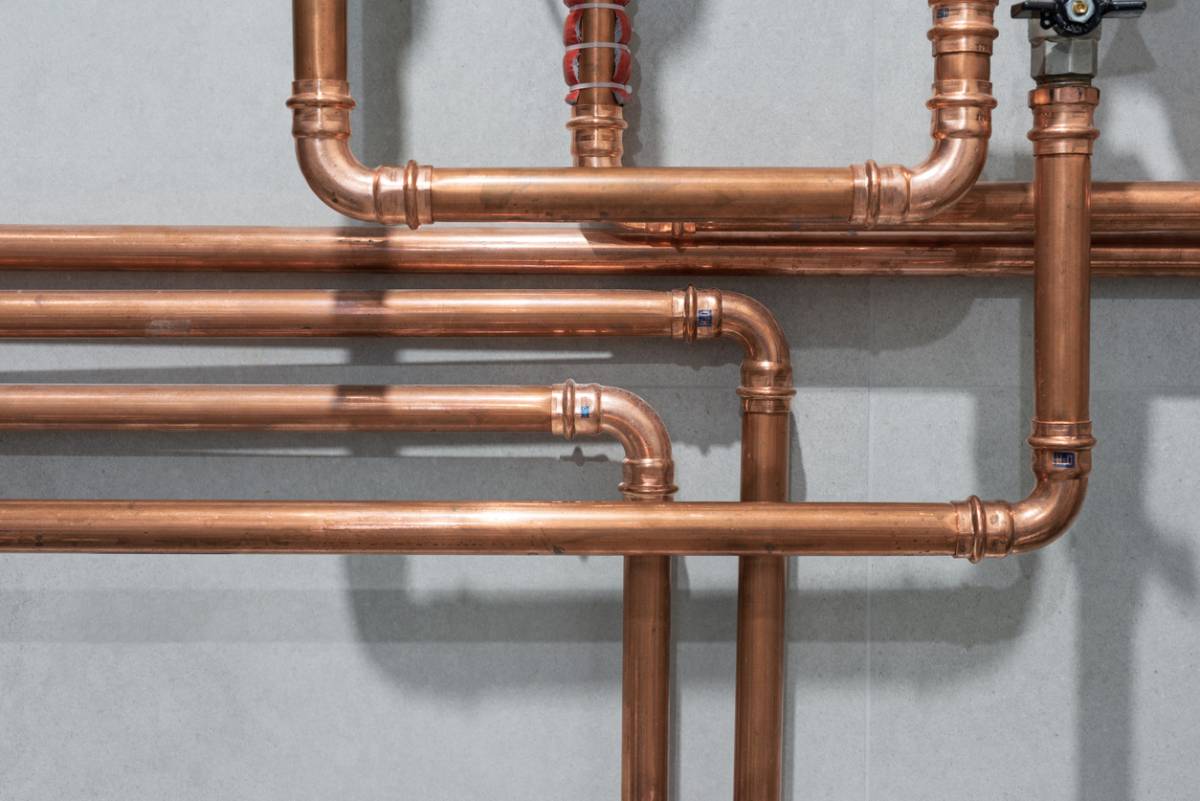
1. Potable Water System

This is the system that brings fresh, clean water into your home. It’s connected to a main supply line, either from the city or a private well, and is pressurized to push water to your sinks, showers, and appliances.

Key Features:

  • Includes water pipes, valves, and fixtures
  • Often made from copper, PEX, or PVC
  • Must be kept free of contaminants for safety

Without a functioning potable water system, daily tasks like cooking, cleaning, or staying hydrated would be impossible. This is one of the most critical systems for everyday living.

2. Sanitary Drainage System

This system removes wastewater from your sinks, tubs, toilets, and appliances. It’s what carries used water out of the building and into either a municipal sewer line or a septic tank.

Signs You Might Have Issues:

  • Gurgling sounds in your drains
  • Foul odors from sinks or showers
  • Frequent clogs or backups

If you’re dealing with any of these, Henrik Plumbing’s drain cleaning services can help get things flowing again fast.

3. Stormwater Drainage System

Not all water comes from a faucet! Rainwater and melting snow need a path away from your property to prevent flooding. That’s where the stormwater system comes in.

This includes:

  • Roof gutters
  • Downspouts
  • Perimeter drains around the foundation

Proper storm drainage is essential for protecting your foundation, basement, and landscaping.

Specialty Plumbing Systems Found in Some Properties

Some properties, especially commercial buildings or larger homes, may also have additional plumbing systems that serve unique needs.

1. Gas Plumbing Systems

Though not part of your water flow, gas lines fall under plumbing because they’re installed and maintained using similar methods. This system delivers natural gas to stoves, water heaters, fireplaces, and more.

2. Irrigation Systems

If you have a lawn or garden, you might also have a dedicated system for irrigation. These are designed to efficiently water outdoor areas without interfering with indoor plumbing systems.

3. Water Heating Systems

Water heaters, whether tankless or traditional, are a crucial part of your plumbing. They provide hot water for bathing, cooking, and cleaning and when they break down, it’s more than inconvenient.

Which Plumbing System Is Most Important?

They all are! Each plumbing system plays a unique role in your home or business, and all need proper maintenance. From ensuring safe drinking water to preventing floods and backups, it’s the combination of systems working together that keeps everything running smoothly.

At Henrik Plumbing, we’re experts in all areas of plumbing, so whether you’re dealing with a leak, a clog, or just need help identifying the issue, we’re here to help.

Need Help Navigating Your Plumbing Systems?

Henrik Plumbing is ready to assist with expert plumbing services throughout your home or business. Schedule your service today and let us help you keep every system flowing smoothly.

featured image for article on how to reupholster an ottoman

How to Reupholster an Ottoman

Even the sturdiest and most reliable ottomans can begin to show signs of wear after years of use. The good news is that reupholstering an ottoman is a manageable project, especially for people with no prior experience. In this article, we discuss how to reupholster an ottoman and walk you through all the steps of the process.

How to Reupholster an Ottoman

One way to reupholster your ottoman is to trust professionals with this job. For this, you will need to find a reliable studio or an individual master who works with furniture restoration, choose the reupholstery fabric, and pick up your ottoman when it is ready.

Having a professional restore your furniture can save you time and effort, but it will be more expensive than doing it yourself. Ottoman reupholstery can be a fun, rewarding, and relatively uncomplicated project if you have never done reupholstery before. Here are the steps we recommend taking when reupholstering your ottoman:

Prepare the Right Tools

Tools that you will need for your ottoman reupholstery project include:

  • A heavy-duty staple gun
  • A staple removal or a flathead screwdriver
  • Pliers
  • Scissors
  • Measuring tape or a long ruler 
  • Chalk for fabric marking
  • Screwdriver if your ottoman has legs that will need to be reattached
  • A sewing machine can be needed for some projects that require sewing cushion covers or piping

Start by Removing the Old Upholstery

We recommend starting with this step because it allows you to measure the old fabric and use the measurements when purchasing new fabric. To remove the old upholstery, follow these steps:

  • Snip the thread that holds the fabric. If the fabric is attached to the ottoman by staples, use a special staple remover or a flat screwdriver. If staples break off during the process, use pliers to remove the remaining parts.
  • Once nothing holds the fabric in place, you can peel it off. However, try not to displace the padding underneath it if possible.
  • Mark all the pieces of the fabric to remember what part of the ottoman they belong to.

Replace the Padding if Necessary

If the padding in your ottoman is uneven or gets damaged or displaced when you take off the old upholstery, consider replacing it with new foam padding or smoothing it out by adding new batting on top of the existing padding. Make sure to take the thickness of the new padding into account when buying and cutting your new fabric.

Prepare the New Fabric

  • Carefully measure the old fabric and add several extra inches to each measurement. If you are a complete beginner, consider purchasing extra fabric to account for potential errors. 
  • Choose the new fabric. We recommend going for durable upholstery fabric. Please note that non-upholstery fabrics will wear out very quickly. Generally, the most durable fabrics are heavy-duty vinyl, polyester, and nylon. Also, some sellers offer upholstery fabric called performance fabric. Leather is a durable option, too, but this material requires special tools and will likely be very challenging to work with for a beginner without specialized training.
  • Once you have your new fabric, transfer the measurements onto it, using a ruler and chalk for fabric marking. Use old fabric as a guide. Once you are certain that all measurements are accurate and you have accounted for folds, wrapping, and attachment, cut the fabric.

Attach the New Fabric to Your Ottoman

To attach the new fabric to your ottoman, start with the top and then reupholster the sides of the ottoman. Make sure that the fabric fits tightly on every side of your ottoman when attaching. Also, make neat corners by securing the folds with staples. We recommend using a staple gun to attach the fabric to your ottoman, as it is one of the most beginner-friendly tools.

Add the Finishing Touches

Once the main part of the reupholstery project is complete, carefully trim away the excess fabric on the bottom of your ottoman and reattach the legs or hardware (make sure everything is attached securely.) You can also add decorative elements to your ottoman, such as piping, decorative buttons, or nailhead trim.

Get a Beautiful New Ottoman at A. Rudin

Reupholstering your ottoman can be a satisfying project and a great way to add a personal touch to your favorite piece of furniture. However, a reupholstering project requires time, patience, and the right tools. If you’re short on time and need a new ottoman, do not hesitate to explore our beautiful and high-quality luxury furniture collections on our website. 

concept for how to keep pet odor from taking over your home

How to Keep Pet Odor From Taking Over Your Home

Pets bring so much joy to people’s lives. They fill homes with joy and laughter. However, they can also introduce persistent unpleasant odors in your home. As a pet owner, it is important that you maintain a fresh and clean environment, not only for your own health and overall wellbeing but also for the health of your pets. And if you are a pet owner, one thing that you probably often wonder about is how to keep pet odor from taking over your home.

Aside from seeking the help of a professional cleaning team, here are other things you can do to keep you home smelling fresh and clean regardless of the fact that you are living with pets.

How to Keep Pet Odor From Taking Over Your Home

Regular Grooming

Your pets need to be regularly groomed. This is not only for their sake, but it is also for your sake and for the sake of everyone who lives in your home. Regular grooming is the first step to controlling odor. Shedding and the accumulation of dander contribute to unpleasant smells. Regular brushing helps reduce these two problems. Bathing your pets regularly with pet shampoo makes a big difference in odor too. Give special attention to dogs because they have a tendency to get dirtier than cats. Remember to clean their paws after their adventures outside to keep outside dirt and debris from entering your home.

Clean Pet Bedding and Toys

Dander, odor and bacteria can accumulate in pet beds and toys so it is important to wash their bedding and toys (especially their favorite chew toys) once a week with hot water and detergent. Be careful to use a detergent that i safe for pets. Washing their bedding and toys help to not only eliminate odors but it can also kill germs and parasites. 

Vacuum and Sweep Regularly

Pet hair and dander can accumulate very fast not only on your floors but also on your furniture. Regular vacuuming and sweeping can help you prevent persistent odors. Give special attention to areas where your pets like to stay. Use a vacuum with a HEPA filter if you want to capture dander and hair effectively. It is also good to use a robotic vacuum for daily maintenance.

Use Air Purifiers

To help get rid of odors and other allergens in the air, use a good air purifier with HEPA filter and activated carbon filter. They are effective in capturing airborne particles and odor. To maximize the effectiveness of your purifiers, place them in areas where your pets like to spend their time.

Use Baking Soda to Neutralize Odor

Baking soda is not only a baking ingredient. It is also an amazing cleaning partner. Mix baking soda with a bit of vinegar and a bit water. Put the mixture in a spray bottle and spray it on their beds, on the sofa and cushions, and on other surfaces where your pets love to stay. This can help neutralize, if not eliminate odor.

Clean Pet Accidents as Soon as You Spot Them

If you have young pets or elderly ones, it can be common for them to have accidents inside your home. It is important for you to clean up as soon as you notice the accident to prevent odors from setting in. Use enzymic cleaners specially designed for pet stains. This will help break down the proteins in feces and urine. This way, you can eliminate not only the stain but also the odor.

Maintain Good Ventilation

To prevent odors from lingering in your home, make sure that you open your windows whenever the weather permits it. This will allow the old air to go out and allow fresh air in to circulate. Exhaust fans in kitchens and bathrooms can help get rid of moisture and odor while ceiling fans can help circulate the air.

Pay Attention to What You Feed Your Pets

Your pet’s diet has an impact on your pet’s odor. Ask for high-quality pet food recommendations from your veterinarian. A good balanced diet supports their overall health and reduces body odor.

Seek Help from Professional Cleaners

One of the most challenging things to clean in homes are rugs and carpets, especially when you have pets. You can regularly clean them using our traditional methods with traditional home cleaners but the best way to make them look brand new and smell fresh and clean is to have them cleaned by professionals at least once a year, or maybe more, depending on your need. If you live in Los Angeles, look for professional carpet cleaners who use non-toxic cleaning solutions to clean issues like pet urine and feces. This will help ensure that not only will you have a fresh-smelling home, but your pets will also be safe from the cleaning products used.

Schedule a Consultation with Experts

Pets are family but keeping your home fresh and clean with them residing inside your home is quite a challenge, requiring constant effort and the right strategies. By following the tips given above, you will be able to enjoy the company of your pets without compromising the comfort that you can get from a fresh-smelling home. Schedule a consultation with professional cleaners today and let them help you keep your home smelling clean.

concept for why to switch to steam cleaning for a carpet

Seven Reasons to Switch to Steam Cleaning

Let’s dive into seven reasons to switch to steam cleaning. Health and wellness have now become many people’s priorities. There is also more awareness about how one’s environment affects overall health and well-being. But here is something you should consider when it comes to keeping the home and office clean. Remember that the method you use for cleaning can make a lot of difference. Traditional cleaning methods often depend on chemically-laden cleaning products that are not only harsh on surfaces but are also bad for your health and the environment. Therefore, exploring other options is something that will be beneficial for you and the environment. Steam cleaning, for example, is a modern and healthier solution that is steadily gaining popularity. 

Whether you do it yourself or opt for professional deep steam cleaning, it is an efficient, versatile, and healthy solution that offers many benefits. Here are seven compelling reasons to switch to steam cleaning.

Seven Reasons to Switch to Steam Cleaning

Chemical-free Cleaning

Traditional cleaning methods rely too much on chemicals. The problem with that is chemicals wreak havoc not only on the environment but also on human health. To name a few of their negative impact on your health, they can contribute to respiratory damage, increase cancer risk, and affect the reproductive system. 

Steam cleaning, on the other hand, is a chemical-free method. This is a cleaning approach that only relies on the power of water vapor. Yes, you can remove dirt and grime without using the cleaning products you have relied on for years! Steam cleaning is a healthier option, especially for homes with children, pets, or residents who are extra sensitive to chemicals.

Effectively Deep Cleans

Surprisingly, with only water vapor, steam cleaning has the power to remove the dirt, grime, and bacteria that traditional cleaning may miss. The high-temperature steam also sanitizes surfaces. It gets rid of molds, dust mites, germs, and bacteria. It deep cleans different types of surfaces including but not limited to your carpets, tile grout, upholstery, and kitchen appliances.

Good for the Environment

By switching to steam cleaning, you also reduce your carbon footprint. Since you only use water and steam, you eliminate the need to clean products in disposable packaging. The switch also lessens the demand for these products, which would minimize the traces of chemicals left in the environment. In addition, since steam cleaning effectively cleans and sanitizes, you will also conserve water.

Cost Effective

While switching to steam cleaning requires a substantial investment in a steam cleaner, it will prove worthwhile in the long run. Since it uses only water, you can finally say goodbye to the cost of chemical cleaners, sprays, and wipes. Without the abrasive effects of chemicals on your surfaces, your upholstered furniture, fabrics, floors, and other surfaces will live longer, thus eliminating replacement costs.

Since steam cleaning is the healthier and more effective option, health issues will also decrease, allowing you to save on medical expenses.

Versatility

Tackle most if not all of the surfaces in your home. From floors and carpets to countertops, bathroom tiles, and windows, your steam cleaner will handle them all.

Time Saver

Because the steam can effectively remove built-up dirt, grime, molds, bacteria, etc. quickly, the need for scrubbing, soaking, and repeating the process will be eliminated. That means you can get more done in less time. The best thing is it will give you more time to enjoy the things that matter most to you.

Improved Indoor Air Quality

With a steam cleaner, you can eliminate the chemicals that you breathe. You are also assured that dust mites, mold spores, and other allergens in the air have also been eliminated.

Switch to Steam Cleaning Today

The benefits of steam cleaning clearly go beyond just simply making your house look clean. By switching to this method, you can be assured of a healthier home for everyone at home while also practicing kindness to the environment. You get to save time, money, and effort and take advantage of one cleaning equipment for almost all of your home surfaces. So, make the switch today by trying out the services of professional steam cleaners.