Featured image for Which Technology Helps Create an Intelligent Classroom Environment

Which Technology Helps Create an Intelligent Classroom Environment

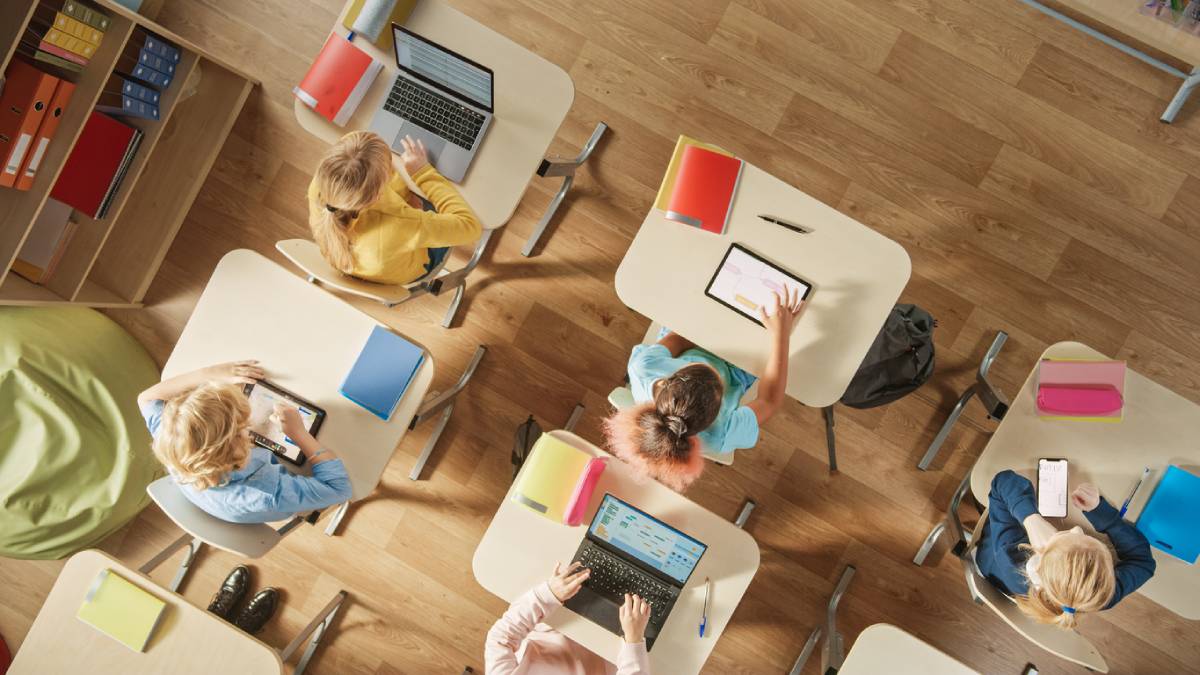
Modern classrooms have come a long way since chalkboards and overhead projectors. Younger students have more access to technology than any previous generation. The availability of such technology has completely transformed the classroom environment. Schools and teachers have had to modify the classroom to keep up with the expansion of available technology and accommodate students’ growing needs. Even more, the learning environment is different for each grade level, so educators have not only had to implement technological changes but have also had to ensure those changes are catered to each age group. Clearly, there are many ways in which technology can aid in learning. Below, you will find more information about which technology helps create an intelligent classroom environment.

Which Technology Helps Create an Intelligent Classroom Environment​

Students thrive in a learning environment that is interactive and technologically advanced. Adding AV equipment for education can level up the classroom experience for students, which can, in turn, benefit the funding for schools and districts. Using AV equipment can also ensure that students are fully prepared for the real world once they graduate. Consider the following technologies that create an interactive and dynamic learning environment.

Smartboard Technology

Smartboards are a necessary tool in modern classrooms. They are interactive learning tools that allow the teacher and students to engage with digital content. It offers digital annotations, multimedia integration, and touchscreen capabilities. These are a standard addition to any classroom that aims to integrate technology from an AV systems manufacturer into the space.

Smartboards encourage hands-on learning, simplify lessons, and cater to modern students. They also allow teachers to utilize various teaching styles. Each student and classroom is uniquely different. Having technology that accommodates changes in the learning environment is highly valuable for teachers and students.

Learning Management Systems

Students are online more than ever. They are also accustomed to immediate gratification. Answers are at their fingertips, and communication is just one click away. Because of that, it is important to have a learning management system. Common systems include Blackboard and Google Classroom.

Learning management systems offer an online portal where students can find information, including their assignments, grades, and communication tools. They can also track their progress to understand what needs to be done. These systems provide a centralized platform for students and teachers. It streamlines communication and ensures easy access to classroom materials and resources.

Gamification Tools

Advancements in technology come with pros and cons, as with everything. Student attention spans are short, and they require immediate gratification in many ways. Combatting this can take a lot of work on behalf of the teacher. However, certain tools can make classroom management much easier. Gamification tools are effective for students with short attention spans.

Platforms that offer learning gamification include Kahoot! And Classcraft. These programs incorporate gaming elements into education, which helps boost student motivation and engagement. Using these tools is just the start, though. It is crucial to incorporate rewards and leaderboards to create a healthy competitive environment. It makes learning much more fun for students and makes them want to keep learning.

Artificial Intelligence

So many professional environments utilize artificial intelligence. It is transforming the modern landscape in so many workplaces. Because of this, incorporating it into the classroom can help students prepare for real-world environments. AI offers so many benefits to students and teachers. Finding ways to incorporate it can pay off in the long run.

Artificial intelligence can be used for personalized learning, including analyzing specific students’ strengths and weaknesses. This information can be used to tailor the lesson to their unique needs. In addition to helping students, it can also help teachers. Many teachers use artificial intelligence as virtual assistants that help with grading automation. These resources save valuable time that can be used for developing lessons and providing curated help to students.

Technology for an Intelligent Classroom Environment

If you want to upgrade your classroom with technology that helps create an intelligent and productive learning environment, contact the team at Kanex Pro for more information today.

Featured image for How to Use Automated Messaging for IT Services

How to Use Automated Messaging for IT Services

Enhancing communication, improving efficiency, and providing timely responses to customer questions is simple with text messaging for IT. Discover how the use of automated messaging for IT services can take your customer service game to the next level and keep your company on top with little effort.

 What is Automated Messaging for IT Services?

Automated messaging implements technology to send and receive messages without the need for human intervention. Regarding IT services, this can be beneficial for sending automated responses to requests, sending notifications regarding important information, and confirming requests or appointments. Specifically, the implementation of automated texting can greatly enhance user experience, reduce response times, and free up personnel for other necessary tasks.

Texting Statistic

Current statistics indicate that texting is the most widely used form of communication for people worldwide. Evidence suggests, particularly in the U.S., that a significant number of adults highly prefer texting over other communication methods available. According to statistics:

  • More than 560 billion texts are sent worldwide every month.
  • 18.7 billion texts are sent daily.
  • 8 trillion texts are sent worldwide every year.

The Popularity of Texting

The first text message recorded in history was sent in December of 1992 by a 22-year-old engineer. Now, in the 21st century, SMS messaging has skyrocketed in popularity. By 2010, it was reported that 200,000 messages were being sent every minute. Quickly following its invention, texting has become the most used form of communication on the market today. The driving forces behind the popularity of texting are its qualities of:

  • Speed
  • Convenience
  • Personalization
  • Facilitating multiple conversations
  • Providing written record of correspondence to reference.
  • Being contactless

Benefits of Automated Messaging in IT Services

  • High rates of engagement: The key component that makes automated messaging so attractive is its rate of engagement. Unlike emails, which only have an open rate of around 20%, automated messages boast an open rate of 98%, making them the frontrunner for marketing and advertising.
  • Immediate attention: Cell phones have become an extension of their owner. IT services can benefit from this immediacy, with which people receive automated SMS messages.
  • Cost-effective: Not only are automated messages great for improving efficiency and enhancing communication, but they are also a great way to market for a fraction of the cost. Methods such as print or TV can be an expensive investment. SMS advertising cuts costs tremendously. Text-related message rates are exceptionally low, making it an excellent option for businesses, both big and small.
  • Speed: Texting has enhanced customer experience by ensuring consistent and timely communication. The result is improved customer satisfaction and better engagement between users and clients. 

How to Use Automated Messaging for IT Services

Automated messaging has opened the door for effective communication in IT services through:

  • System monitoring and alerts: Automated messaging can be used proactively by monitoring the operational status of systems and alerting when there is a discrepancy. This prompts quicker resolution when issues arise and fosters minimal downtime.
  • User support and management: Automated messaging can make managing user support tickets more efficient and provide an instant response to common questions and concerns. Consequently, this can reduce the workload for employees, freeing up time.
  • Notifications and updates: Automated text messaging can also be used to update users on important information regarding scheduled maintenance and service updates. This can significantly reduce the number of customer service tickets received during these times.

Future Trends

The future of automated messaging in IT services is prime for growth and advancement. Technologies such as automated messaging enable systems to become more intuitive, making personalizing communication easier than ever and automating complex tasks more effectively. Statistics indicate that automated messaging is rapidly growing and showing no indication of stopping.

Automated Messaging Services with Trumpia

Automated messaging is a crucial component of successful IT Services because it increases efficiency and enhances user experience. By taking advantage of this modern convenience, organizations can achieve improved performance and ensure customer satisfaction.

Contact Trumpia today to expedite your business processes with automated messaging.

Featured image for How to Wire a Push Start Button

How to Wire a Push Start Button

A push start button is a popular feature in modern cars. It allows you to start the engine by pressing a button and eliminates the need for a traditional key to start the car. Wiring a push start button is an easy way to modernize your car’s ignition system. You will need a few tools and custom wires and cables to get started, but you will surely benefit from the simplicity provided by your push start. Below, you will find instructions on how to wire a push start button.

How to Wire a Push Start Button

Customizing your car with a push start button requires careful attention and ultra-flexible wire. These are necessary to ensure your safety as you deal with the car’s electrical connections. Consider the following steps if you are wiring a push start button in your car.

Gather Your Tools

You will need several tools and materials to get started with the installation process. Specifically, you will need to acquire a push start button, wire cutters and strippers, electrical tape, multimeter, screwdrivers, and heat shrink tubing. You will also need custom wires, cables, and a wiring diagram for your car. These are the basic tools and materials necessary to complete the push-start button process.

Research Your Car’s Ignition System

Before you start tinkering with anything, go over your car’s wiring diagram. You must do this to ensure you have a complete understanding of how the ignition system operates. It also allows you to safely and accurately make modifications to the system. Locate the power source, starter wire, accessory wire, and ground wire. These are necessary to understand how to connect the power source to the motor.

Disconnect The Battery and Locate Wires

As you navigate the process, begin by turning off the ignition. From there, disconnect the negative terminal of the car battery. This step is crucial to preventing short circuits or electrical shock. Working on the wiring of your car requires care and caution for your safety.

Use the wiring diagram from your car to locate the ignition wires. Test the wires with a multimeter tool to ensure they are fully functioning. Ensuring the wires are fully functioning prevents mistakes. If you are not careful, these mistakes can cause serious damage to your car’s electrical system.

Prepare The Push Start Button

Find and assess the push start button connection points, namely the power, ground, accessory, and starter points. You can use ultra-flexible wire for connections in places where flexibility is necessary. Using the right type of wire ensures a durable and long-lasting connection. 

Connect and Test the Wires

Connect the power, starter, accessory, and ground wires. You should connect a custom wire to the power source and to the push start button’s power terminal. Use a fuse inline for safety purposes. Specifically, it will reduce the risk of electrical surges or other damage. Attach the starter wire from the ignition system to the starter terminal on the push button. 

Next, connect the accessory wire to the designated terminal on the push button. This will power the secondary systems, including the dashboard and radio. Lastly, connect the ground wire to the ground terminal. Connect the car battery and test the connections to see if everything is working properly. 

Mount the Push Start Button

Once you have secured and tested the wires, mount the push start button. Choose a location on your dashboard that is convenient. Placing it somewhere that is easily accessible is important. Use a drill to create a hole to secure the button with the push start button’s mounting hardware.

Custom Wires and Cables

If you want to install a push start button, contact the team at Calmont Wire & Cable today to get started.

Featured image for How Often Should You Change Your Phone Case

How Often Should You Change Your Phone Case?

Cell phones have become an extension of their users and a nearly universal aspect of modern life. Because we use these products so regularly, it is important to have smartphone accessories to complement their use. Arguably, the most essential smartphone accessory is the cell phone case. Cell phone cases not only offer protection from everyday accidents, but they also add a touch of personalization and uniqueness to your daily ensemble. Given the prominence of cell phones and the need to protect them, the question of how often you should change your phone case often arises. Below, we examine the answer to this question.

How Often Should You Change Your Phone Case?

Several indicators convey it is time to invest in a new phone case. Some of the most common include:

Physical Damage: Cracks, Scratches, and Chips

The majority of phone damage stems from being dropped. If your case shows visible signs of damage, such as cracks, deep scratches, or separation anywhere, it reduces the efficacy of the case’s protective capabilities.

Wear and Tear: Fading, Discoloration, and Deterioration

Day-to-day activities can compromise the look, feel, and protection provided by your case. If your case is looking past its prime, it may be time to replace it. Consider if it is beginning to appear worn out, has any loose areas or stitching, becomes faded or discolored, or has stretched, and look for replacements if that is the case.

Functionality Defects: Loose Fit

In addition to damage and defects, assess the fit of your case. Over time, cases bend, move, and stretch, causing your phone to fit loosely within and putting it at a higher risk of breaking or damage. Your phone should sit snugly inside the case with no room to shift or move. If, after your visual assessment, you find that your case needs replacing, get a new phone case to ensure your phone’s protection.

Influencing Factors of Case Replacement

Materials

Another contributing factor to the life of your phone case is the materials it is composed of. Some materials, such as polycarbonate, are more durable than others. Silicone options, on the other hand, lack durability and can show wear rather quickly but offer better grip.

Different materials have different advantages and downfalls. Consider which of these is a priority to you and choose your phone case based on those factors.

Lifestyle: High-Impact & Low-Impact Users

One of the defining elements contributing to the life of your case is the type of lifestyle you lead. Some professions can be harder on your phone case. For instance, an attorney in an office is less likely to encounter situations that result in physical cell phone damage than a construction who spends their days around power tools. For individuals in more physically precarious work situations, opting for a phone case that prioritizes protection is going to be beneficial.

Preference: Trends and Aesthetics

In the same way that style is ever-changing, so too may your phone case preferences change. You may choose to replace your phone case regularly to suit your maturing style, to have multiple options to choose from, or just because you found a new one you like.

Choosing Your Next Phone Case

Prioritize Durability and Protection

Regardless of lifestyle or profession, considering the financial investment of some smartphones, it is a good rule to prioritize durability and protection when choosing your phone case. There are endless options for phone cases that offer adequate protection. It is practical to make keeping your phone safe and undamaged the first and foremost priority.

Material

The right material for your lifestyle can mean the difference between a drop that ends in relief or devastation. Those who are prone to dropping their phones should consider a silicone or rugged case. Those searching for a mix of elegance and adequate protection should consider high-quality leather.

Added Protection

The added features do make a difference in how safe your case keeps your phone. Choosing a case with bezels to protect your screen and reinforcer corners is encouraged. These additional details offer one extra cushion of protection between your phone and a potentially expensive fix.

Caring for Your Phone Case

After you have selected your new phone case, you can take a few simple steps to keep it as good as it is now. You must regularly clean your phone case to keep it in good condition and prevent any cosmetic defects. Remove your case from your phone, and if the material can withstand it, use soap and water to remove bacteria and gunk from the case. If dirt and debris are allowed to build up over time, they can cause your phone to malfunction.

ITSKINS Quality Phone Cases

If it is time for you to replace an old or outdated phone case, consider the quality cases and other smartphone accessories at ITSKINS.

Featured image for How to Use Mass Texting for Student Populations

How to Use Mass Texting for Student Populations

Using mass text messaging software opens the door for multiple uses, ranging from business to education. Below, we cover key tips for how to use mass texting for student populations.

Why Use Mass Texting for Students

Navigating the university experience can prove challenging. However, having ready access to relevant information can help level the playing field, giving students more time to focus on their studies. With open rates approaching 98%, texting engages audiences more than most other communication methods. Compared to email, this means those receiving texts prove far more likely to open and actually read the information sent to them. 

Students need to juggle multiple deadlines, changing schedules, and more. Administrations that use mass texting can help ease this burden through a modern, effective communication method like texting.

How to Use Mass Texting for Student Populations

Mass texting can serve as a valuable tool for university administrators. However, like any tool, it only makes things easier when it is used properly. Below, we break down a few key tips for mass texting student populations.

Follow All the Usual Rules

Regulations govern sending out mass text messages. This is true for businesses and any organization, including universities.

  • Opt-In: A student must opt-in to receive messages before you can send them out. While university administration likely has each student’s number on file, that does not mean they can send messages without consent. Additionally, students must be able to opt-out at any point. 
  • Message Quality: Clear, concise, and accessible. For messaging to be effective, it needs to follow these three tenets. 
  • Data Security: Appropriate measures must be taken to protect student information and confidentiality. Fortunately, universities typically already have such measures in place.
  • Monitor Engagement: Tracking open rates and engagement statistics can help improve your process over time. Hone your approach for maximum engagement by using Trumpia’s extensive analysis tools.

Top Uses for Student Mass Texting

Mass texting for students should always be about helping them achieve success. With that in mind, universities can use mass texting in a range of helpful ways to enhance a student’s experience.

Academic Updates

Notify students about upcoming exam schedules or other deadlines. Meeting deadlines can make or break a college experience. Some core updates include registration, financial aid applications, and class add/drop dates. You can also create updates about grades being posted and class cancellations.

Campus Events

Student community engagement can play a crucial role in how a student feels on campus. Sending out information about event announcements, guest speakers, and job fairs can bring the population together.

Student Support

Universities do more now than ever to support students in their journeys. From mental health services to academic counseling, programs exist to help students find success. However, those services may be unknown to many students. Mass texting gets that information into their hands and makes it easier to sign up for appointments.

Emergency Notifications

Student safety is a priority on any campus. The type of risks can vary by state and city, but students should always know if they are endangered. Common emergency alerts include crime notifications, weather alerts, and other safety concerns.

Admissions and Recruitment

Even before a student enrolls, texting can help ease them into the process. Many universities use mass texting to notify individuals of application deadlines, open house events, and financial aid information.

Alumni Engagement

Graduation does not have to spell the end of a student’s engagement with their university. Mass texting can be helpful for a range of outreach needs. Try mass texting to notify your audience about alumni events, donation appeals, and networking opportunities.

Mistakes to Avoid When Sending Texts to Student Populations

Keep in mind a few elements to avoid when texting students. These include:

  • Too many messages: Keep your updates to useful (and important) ones. Message overload often leads to opt-outs.
  • Using only one avenue: Never rely solely on one mode of communication, especially for vital information. Use email, physical correspondence, and texting together as needed. Get that information into your student’s hands one way or another.
  • Bad timing: set messages to reach students when they are not in class (or asleep). Trumpia provides exceptional automation options so you can send messages to different students at the times that are best for them.

The Go-To Company for Mass Texting

Trumpia provides top-of-the-line automated texting software for businesses, organizations, and institutions across the country. From Fortune 500 companies to local organizations, we help users unlock new, efficient ways to connect with their audiences.

Featured image for How to Build a Home Movie Theater

How to Build a Home Movie Theater

Building a home movie theater is a fun addition to your home that the whole family can enjoy. It may even be more cost-effective in the long run if you are a movie-loving family. Designing your home theater can be fun, but it requires a lot of planning. Below, you will find helpful information on how to build a home movie theater. 

How to Build a Home Movie Theater

Building a home movie theater takes careful planning and attention to detail. Complete extensive research and consult with a residential AV solutions expert before you get started. Consider the following as you navigate building your home theater.

Consider Your Layout

Be sure to carefully consider your layout before you buy any technology or other equipment. Double-checking what you need and what you have space for will save you headaches down the road. Once you have chosen the room for your home theater, take some measurements. Consider the speaker placement, seating, and the distance from the seats to the screen. Determine the size of your screen (measured diagonally). You should have at least 1.5 times the distance between the seating and the screen based on the screen’s size. Be sure to plan the speaker placement as well.

Choose Your Screen

After you map out your home theater room, consider the type of screen you want to use. The screen is the center of the space, so it is crucial to choose one based on your unique needs. You can opt for a television or projector. Televisions are great for smaller theater rooms. They work well if you have a lot of natural light. If you purchase a new television, consider at least 4K for the best quality.

Projectors are also an excellent option for home theaters. They are best for larger home theaters with a lot of wall space. You can have a completely immersive experience as they can be 100 inches or more. Be sure to consider the amount of natural light in your space. Projectors and screens are not great if you have a lot of windows and light coming in.

Choose Your Sound System

The second most important piece of the home theater puzzle is likely the audio system. The right sound system can create an immersive experience, just like you are at the theater. There are several different types of sound systems. Surround Sound and Dolby Atmos are the most popular due to their benefits.

Speaker placement is key to ensuring you have the best experience. Depending on the type of sound system you get, you may need to modify your setup. However, place the front left, center, and right speakers near the display screen. A subwoofer should go right in front of the screen for the best results. Lastly, the rear sound speakers should be behind and to the sides of the main seating area. Work with a skilled AV equipment manufacturer for the best results when it comes to the audio setup.

Arrange Your Seating

To fully enjoy your home theater, you must have a comfortable setup. Common theater seating includes recliners, sofas, and sectionals. If you have a lot of space, you can create tiered-style seating to further replicate the feeling of being at the movies. Remember that spacing is an integral part of the seating plan setup. You want to be far enough away to be able to comfortably watch the movie without straining your eyes.

AV Equipment Manufacturer

If you want to build a home theater, contact the team at Kanex Pro to get started.

Featured image for Can I Convert An Audio CD to DVD

Can I Convert an Audio CD to a DVD?

CDs were a staple of the music world in the 90s and 2000s. Now, they are relics, mostly kept for sentimental rather than functional reasons. You may still have a CD case filled with your favorite artist’s albums, but find that it is difficult to find the technology required to play them. Many modern cars no longer have a CD player installed in them, and they are less common in physical stores than they were in the past. If you are facing the problem of having too many obsolete CDs, you may wonder if you can convert an audio CD to a DVD. Below, you will find helpful steps about how to transfer and listen to your favorite music from the last few decades.

Can I Convert an Audio CD to a DVD?

Converting an audio CD to a DVD offers many benefits. You can store more songs, integrate video content, and improve compatibility. You will need several tools to do this. The tools include a computer with a CD/DVD drive, audio converters, DVD software, and blank DVDs. The tools are necessary as there are unique differences between CDs and DVDs. 

CDs are designated for high-quality audio. It can hold around 80 minutes of uncompressed sound. However, they can only be used in CD players, computers, and car stereo systems. Alternatively, a DVD offers so much more storage space. In fact, it can hold over 4 GB of data on a standard DVD. DVDs are also compatible with DVD players and many popular gaming consoles. 

How To Convert an Audio CD to a DVD

There are several steps to convert your CD to a DVD. For some, this will be a refresher of information you already know, and for others, we will share new information you had not known you needed. Whatever category you fall into, you can follow the following steps when determining if you can convert an audio CD to a DVD. 

Gather Your Tools

You will need a computer with a CD/DVD drive (or an external drive you can connect to your computer), an audio converter, DVD player software, and a blank DVD. These tools will help with the seamless conversion of your audio CDs to DVDs. 

Extract the Audio

After you have gathered all of your tools, use an audio converter to extract the audio from your CD. Once extracted, save them as digital audio files. For the best sound, save them as WAV or FLAC files. Saving them as MP3 files will also work. 

Organize and Edit Your Audio Files

Label and organize your files right after you extract them. Organizing your files sooner rather than later will make the next few steps much easier for you. Once you have organized the files, review the audio and make any necessary adjustments. This may include adjusting the volume levels or improving the sound quality. 

If you want to add visual content to your audio, you should do so at this step. You can use video editing software to sync the audio and visual elements and add anything from lyrics to a slideshow or art.

Burn the DVD

Using the audio converter software, import the files you just edited. Put them in the order you want. Insert the blank DVD into the computer and follow the instructions prompted by the software. Once you complete this step, you will have successfully converted your CD to a DVD.

Audio Visual Systems Manufacturer

If you have CD files you are not ready to part with, consider moving that information to the more accessible DVD format. You can get help with this and more from a highly rated audiovisual systems manufacturer. Contact Kanex Pro today and make use of your old technology.

Featured image for HDMI vs I2S for Audio

HDMI vs I2S for Audio

Audio quality can make or break your listening experience. When it comes to high-quality audio, two technologies are common in both personal and professional settings: HDMI and I2S. Both are excellent options for audio playback, but they do have unique differences. Which option is right for you will depend on your needs. Below, we pit HDMI vs I2S and outline the differences between them so you can determine which one is right for you.

HDMI vs I2S for Audio

Understanding the differences between HDMI and I2S will help you determine which one is right for you. Consider the following information about both options.

HDMI

HDMI is a common cable technology used for audio presentation. It is highly popular and widely used for personal and professional technology setups. HDMI cables are often used in gaming consoles, televisions, soundbars, conference room setups, home theater systems, and a plethora of other arrangements. HDMI cables carry digital signals for audio and video, which is why they are used across a variety of platforms. Due to its versatility, it is considered the industry standard when it comes to audio cables.

There are several advantages of using an HDMI for audio. Unlike other options, it transmits high-resolution audio formats, with up to 32 channels of audio. It also reduces physical clutter as it can transmit audio and video in just one cable. The ability to transmit both makes it a top competitor among other audio cables. While HDMI is highly beneficial, there are some disadvantages. It can have some latency issues due to the fact that it transmits both audio and video. Additionally, there is some signal degradation in cables longer than 50 feet.

I2S

I2S transfers digital audio from one component to another. It offers excellent audio as it has a simple clocking system with separate features, including separate clock lines, word selection, and data. These features ensure audio signals are synchronized. Common uses for I2S include digital-to-analog (“DAC”) converters, audio-integrated circuits (“IC”), and amplifiers. I2S is not as versatile as HDMI, so it is not considered an industry standard.

Despite the limitations of I2S, it offers several benefits that make it an excellent choice for audio professionals. It offers very high-quality audio that is unparalleled. This is why it is a top choice for DACs and amplifiers. The transmission is also highly efficient. Because it only transmits audio, there are no latency issues. This results in a much more efficient transfer of data. Another benefit is the low risk of jitter, which is necessary for high-quality audio transmission. While I2S offers excellent audio, there are some drawbacks. It is used for specific applications. Because of this, it is not universally available for various types of technology. 

Which Audio Option is Right for You?

When deciding between audio transmission options, there are several factors to consider. HDMI is wonderful for televisions, gaming consoles, and home theater systems because it can effectively connect a wide range of audio devices. It also offers both audio and video transmission and limits the number of cords required.

Alternatively, I2S is more of a niche form of audio transmission. It is a great option if you are using high-end audio technology, such as DACs, music players, and other professional audio gear. Unlike HDMI, I2S is not commonly used for consumer electronics. It is used internally in more professional technology setups that require the very best in audio transmission. 

AV Technology Retailer

No matter what cord you need for your personal or professional life, you can get it from an AV technology retailer.  To determine if you need HDMI or I2S, contact Kanex Pro today.

Featured image for How to Set Up a Video Conference Room

How to Set Up a Video Conference Room

The last few years have changed the landscape of offices all over the country. Many workplaces offer hybrid or even fully remote work schedules. The increase in remote teams and hybrid work has increased the demand for video conferencing. A fully functional video conference room is critical for businesses in every industry. An effectively designed video conference room with corporate AV solutions creates room for business growth and opportunity. Below, you will find information about how to set up a video conference room.

How to Set Up a Video Conference Room

An excellent video conference room setup is necessary for several reasons. It can improve communication and team collaboration and increase avenues for professionalism. There are several factors to consider when setting up your business’s video conference room. Consider the following and implement what is right for your business.

Choosing Your Conference Room Space

Before you purchase any equipment, it is important to choose the right space for your video conference room. There are several factors to consider. Some may apply to your unique business, and some may not. Consider what works for you to ensure your business needs are met. Factors to consider include lighting, size, privacy, and acoustics.

Opt for rooms with natural light for the best results. Direct sunlight may need to be addressed with curtains or blinds to avoid glare. Despite this, natural light is still the best option for video conferencing. The amount of space in the room depends on your unique needs. Depending on your industry, privacy is an essential factor. Lastly, determine how good the acoustics are before you get started. This can make or break video calls, as quality sound is a necessary component.

Purchase Video Conferencing Equipment

Each business has its own unique needs when it comes to video conferencing. However, consider your business needs. Typical items needed for all industries include a display, camera, microphone, speaker, audio-visual control system, and lighting. This technology ensures that you have clear videos with great audio. It is also necessary for seamless connectivity without any interruptions.

There are several options for each of the items needed to get started. Your internal IT team may be able to provide guidance. However, it is helpful to work with a professional. A skilled audio-visual equipment supplier can provide you with the right equipment for your business needs. This can save you time and money in the long run. Getting it right the first time can be the difference in your business success. 

Getting Started with Setup

Once you have secured your space and got the right equipment, it is time to get started with setup. Start with placing your camera where you want it. Test it out to be sure you have the right angle and good lighting. Next, set up the microphone and speaker. This setup will differ depending on the size of your video conference room. The display should be clear for all of the participants. Be sure to test out the display position to ensure it is clear without obstruction. 

Before your first meeting, test out the connectivity and video conferencing software. Preliminary testing is a crucial step that many people bypass. It can make a huge difference, as tech issues when meeting with clients or executives can make you look bad. Ensure your internet connection has a strong signal and that your camera and microphone quality are up to standard. Having these things set up ahead of time can make you look like a professional and help you avoid any unnecessary hiccups.

Audio-visual Equipment Supplier

If you need to update or set up a video conference room for your business, contact the professional at Kanex Pro today!

Featured image for Why You Need a Tablet Case

Why You Need a Tablet Case 

Tablets are helpful devices for both your personal and professional life. You can easily navigate email, engage in active or passive entertainment, surf the web, and do a host of other activities. A tablet is a major investment in your tech devices. They offer the benefits of both a laptop and a cell phone conveniently wrapped into one device. Because of this, it is important to protect your tablet. Below, you will find the top reasons why you need a tablet case.

Why You Need a Tablet Case 

A tablet can cost anywhere from a couple hundred to a couple thousand dollars. No matter which end fits your budget, you will benefit from protecting your device from damage. One of the best ways to ensure it stays in good shape is to get a case. Consider the following reasons why you need to invest in tablet protection.

Accident Protection

A case can protect your tablet from damage caused by accidents. It is easy to drop your tablet even if you are careful. Without a case, a drop can lead to serious issues. You can easily crack the screen and cause internal damage. Tablets have internal components that can be easily damaged and cause issues. 

The cost of repairs for screen damage can be a few hundred dollars. Alternatively, internal damage to the battery, motherboard, or buttons can be as much as the cost of replacing your device. These costs can be easily avoided by purchasing a tablet case.

Improves Handling

Tablets are often slim and slippery due to the sleek design. This is an excellent feature as they are often lightweight and easy to transport. However, it can make them much more difficult to handle. They can easily slip out of your hands and get damaged.

To reduce the risk of damage caused by mishandling your tablet, purchase a case. Several different types of cases can reduce the risk of damage. Rubberized edges or textured material can help handle your tablet with ease.

Cost-Effective Investment

Purchasing a tablet case is a cost-effective insurance plan for your device. While you can also get actual insurance, a case can ensure you do not have to waste your time. Getting your device fixed with insurance may reduce the costs. However, you still have to count the amount of time lost without your tablet. This can be impactful if you use it often.

A case can cost less than $50, depending on what you shop. This is a steal when you consider the costs of replacement or repair. It is also helpful to consider that damage does more than drain your pocketbook. Damage to your tablet can reduce your productivity, slow down the system, and decrease the potential resale value. 

Show Your Style

A case for your device can also show your personality. There are several designs that are simple and sleek. However, there are a number of designs that vary in color, design, and material. Pick a tablet case that represents who you are. There are even options that prioritize sustainable innovation. You can feel confident that your case is not contributing negatively to your ecological footprint. 

In addition to representing your style, many cases have additional functional features that are highly beneficial. Some cases have kickstands, keyboards, and stylus holders, which can facilitate their ease of use. It can also improve your productivity. Consider your personal needs, whether they are for work, school, or personal use. Filter for features that can improve your user experience. 

Tablet Protection

If you do not have a case for your tablet, check out the selection at ITSKINS today!