Featured image for Can I Convert An Audio CD to DVD

Can I Convert an Audio CD to a DVD?

CDs were a staple of the music world in the 90s and 2000s. Now, they are relics, mostly kept for sentimental rather than functional reasons. You may still have a CD case filled with your favorite artist’s albums, but find that it is difficult to find the technology required to play them. Many modern cars no longer have a CD player installed in them, and they are less common in physical stores than they were in the past. If you are facing the problem of having too many obsolete CDs, you may wonder if you can convert an audio CD to a DVD. Below, you will find helpful steps about how to transfer and listen to your favorite music from the last few decades.

Can I Convert an Audio CD to a DVD?

Converting an audio CD to a DVD offers many benefits. You can store more songs, integrate video content, and improve compatibility. You will need several tools to do this. The tools include a computer with a CD/DVD drive, audio converters, DVD software, and blank DVDs. The tools are necessary as there are unique differences between CDs and DVDs. 

CDs are designated for high-quality audio. It can hold around 80 minutes of uncompressed sound. However, they can only be used in CD players, computers, and car stereo systems. Alternatively, a DVD offers so much more storage space. In fact, it can hold over 4 GB of data on a standard DVD. DVDs are also compatible with DVD players and many popular gaming consoles. 

How To Convert an Audio CD to a DVD

There are several steps to convert your CD to a DVD. For some, this will be a refresher of information you already know, and for others, we will share new information you had not known you needed. Whatever category you fall into, you can follow the following steps when determining if you can convert an audio CD to a DVD. 

Gather Your Tools

You will need a computer with a CD/DVD drive (or an external drive you can connect to your computer), an audio converter, DVD player software, and a blank DVD. These tools will help with the seamless conversion of your audio CDs to DVDs. 

Extract the Audio

After you have gathered all of your tools, use an audio converter to extract the audio from your CD. Once extracted, save them as digital audio files. For the best sound, save them as WAV or FLAC files. Saving them as MP3 files will also work. 

Organize and Edit Your Audio Files

Label and organize your files right after you extract them. Organizing your files sooner rather than later will make the next few steps much easier for you. Once you have organized the files, review the audio and make any necessary adjustments. This may include adjusting the volume levels or improving the sound quality. 

If you want to add visual content to your audio, you should do so at this step. You can use video editing software to sync the audio and visual elements and add anything from lyrics to a slideshow or art.

Burn the DVD

Using the audio converter software, import the files you just edited. Put them in the order you want. Insert the blank DVD into the computer and follow the instructions prompted by the software. Once you complete this step, you will have successfully converted your CD to a DVD.

Audio Visual Systems Manufacturer

If you have CD files you are not ready to part with, consider moving that information to the more accessible DVD format. You can get help with this and more from a highly rated audiovisual systems manufacturer. Contact Kanex Pro today and make use of your old technology.

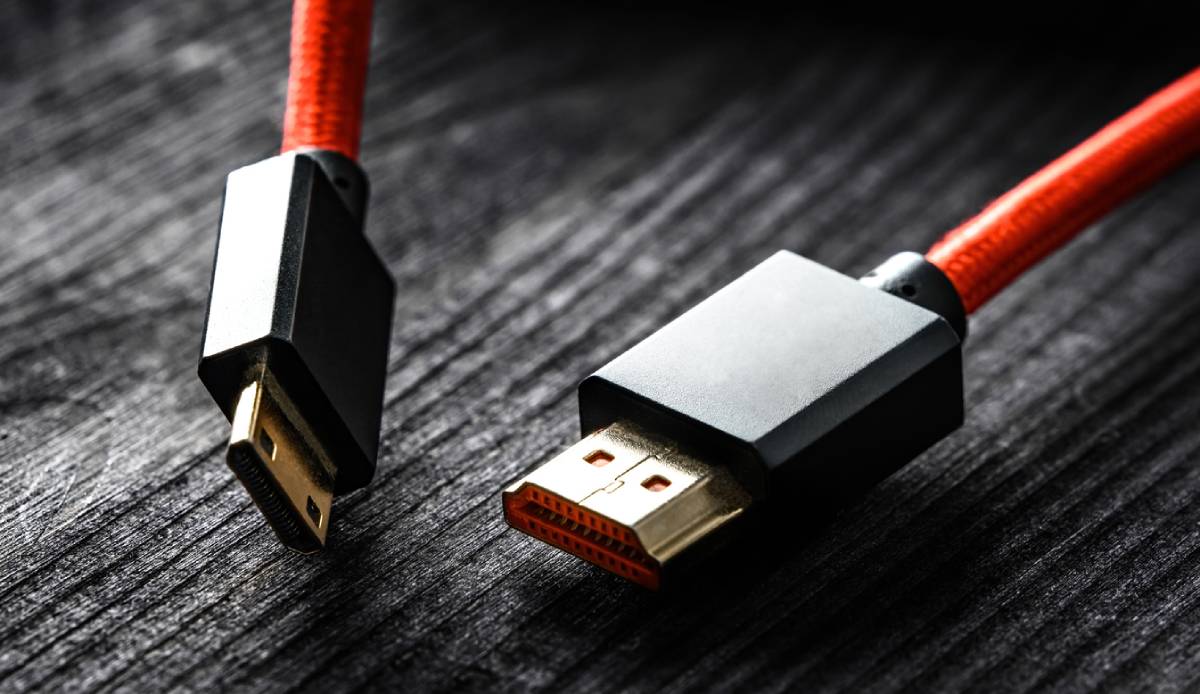
Featured image for HDMI vs I2S for Audio

HDMI vs I2S for Audio

Audio quality can make or break your listening experience. When it comes to high-quality audio, two technologies are common in both personal and professional settings: HDMI and I2S. Both are excellent options for audio playback, but they do have unique differences. Which option is right for you will depend on your needs. Below, we pit HDMI vs I2S and outline the differences between them so you can determine which one is right for you.

HDMI vs I2S for Audio

Understanding the differences between HDMI and I2S will help you determine which one is right for you. Consider the following information about both options.

HDMI

HDMI is a common cable technology used for audio presentation. It is highly popular and widely used for personal and professional technology setups. HDMI cables are often used in gaming consoles, televisions, soundbars, conference room setups, home theater systems, and a plethora of other arrangements. HDMI cables carry digital signals for audio and video, which is why they are used across a variety of platforms. Due to its versatility, it is considered the industry standard when it comes to audio cables.

There are several advantages of using an HDMI for audio. Unlike other options, it transmits high-resolution audio formats, with up to 32 channels of audio. It also reduces physical clutter as it can transmit audio and video in just one cable. The ability to transmit both makes it a top competitor among other audio cables. While HDMI is highly beneficial, there are some disadvantages. It can have some latency issues due to the fact that it transmits both audio and video. Additionally, there is some signal degradation in cables longer than 50 feet.

I2S

I2S transfers digital audio from one component to another. It offers excellent audio as it has a simple clocking system with separate features, including separate clock lines, word selection, and data. These features ensure audio signals are synchronized. Common uses for I2S include digital-to-analog (“DAC”) converters, audio-integrated circuits (“IC”), and amplifiers. I2S is not as versatile as HDMI, so it is not considered an industry standard.

Despite the limitations of I2S, it offers several benefits that make it an excellent choice for audio professionals. It offers very high-quality audio that is unparalleled. This is why it is a top choice for DACs and amplifiers. The transmission is also highly efficient. Because it only transmits audio, there are no latency issues. This results in a much more efficient transfer of data. Another benefit is the low risk of jitter, which is necessary for high-quality audio transmission. While I2S offers excellent audio, there are some drawbacks. It is used for specific applications. Because of this, it is not universally available for various types of technology. 

Which Audio Option is Right for You?

When deciding between audio transmission options, there are several factors to consider. HDMI is wonderful for televisions, gaming consoles, and home theater systems because it can effectively connect a wide range of audio devices. It also offers both audio and video transmission and limits the number of cords required.

Alternatively, I2S is more of a niche form of audio transmission. It is a great option if you are using high-end audio technology, such as DACs, music players, and other professional audio gear. Unlike HDMI, I2S is not commonly used for consumer electronics. It is used internally in more professional technology setups that require the very best in audio transmission. 

AV Technology Retailer

No matter what cord you need for your personal or professional life, you can get it from an AV technology retailer.  To determine if you need HDMI or I2S, contact Kanex Pro today.

Featured image for How to Set Up a Video Conference Room

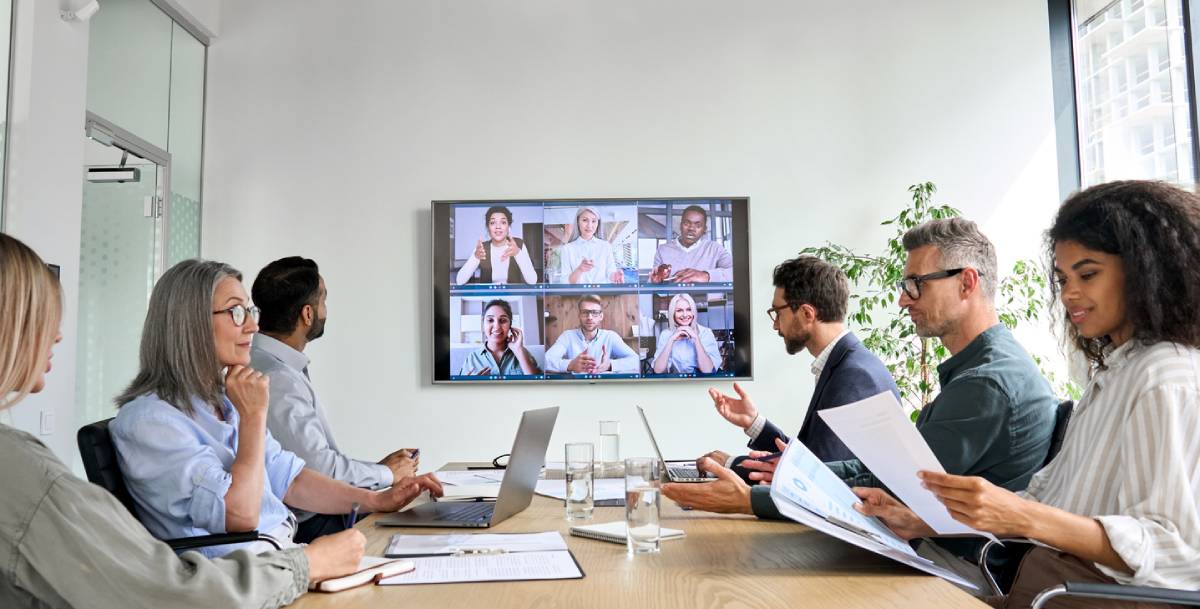
How to Set Up a Video Conference Room

The last few years have changed the landscape of offices all over the country. Many workplaces offer hybrid or even fully remote work schedules. The increase in remote teams and hybrid work has increased the demand for video conferencing. A fully functional video conference room is critical for businesses in every industry. An effectively designed video conference room with corporate AV solutions creates room for business growth and opportunity. Below, you will find information about how to set up a video conference room.

How to Set Up a Video Conference Room

An excellent video conference room setup is necessary for several reasons. It can improve communication and team collaboration and increase avenues for professionalism. There are several factors to consider when setting up your business’s video conference room. Consider the following and implement what is right for your business.

Choosing Your Conference Room Space

Before you purchase any equipment, it is important to choose the right space for your video conference room. There are several factors to consider. Some may apply to your unique business, and some may not. Consider what works for you to ensure your business needs are met. Factors to consider include lighting, size, privacy, and acoustics.

Opt for rooms with natural light for the best results. Direct sunlight may need to be addressed with curtains or blinds to avoid glare. Despite this, natural light is still the best option for video conferencing. The amount of space in the room depends on your unique needs. Depending on your industry, privacy is an essential factor. Lastly, determine how good the acoustics are before you get started. This can make or break video calls, as quality sound is a necessary component.

Purchase Video Conferencing Equipment

Each business has its own unique needs when it comes to video conferencing. However, consider your business needs. Typical items needed for all industries include a display, camera, microphone, speaker, audio-visual control system, and lighting. This technology ensures that you have clear videos with great audio. It is also necessary for seamless connectivity without any interruptions.

There are several options for each of the items needed to get started. Your internal IT team may be able to provide guidance. However, it is helpful to work with a professional. A skilled audio-visual equipment supplier can provide you with the right equipment for your business needs. This can save you time and money in the long run. Getting it right the first time can be the difference in your business success. 

Getting Started with Setup

Once you have secured your space and got the right equipment, it is time to get started with setup. Start with placing your camera where you want it. Test it out to be sure you have the right angle and good lighting. Next, set up the microphone and speaker. This setup will differ depending on the size of your video conference room. The display should be clear for all of the participants. Be sure to test out the display position to ensure it is clear without obstruction. 

Before your first meeting, test out the connectivity and video conferencing software. Preliminary testing is a crucial step that many people bypass. It can make a huge difference, as tech issues when meeting with clients or executives can make you look bad. Ensure your internet connection has a strong signal and that your camera and microphone quality are up to standard. Having these things set up ahead of time can make you look like a professional and help you avoid any unnecessary hiccups.

Audio-visual Equipment Supplier

If you need to update or set up a video conference room for your business, contact the professional at Kanex Pro today!

Featured image for Common Challenges With AV Systems Installation

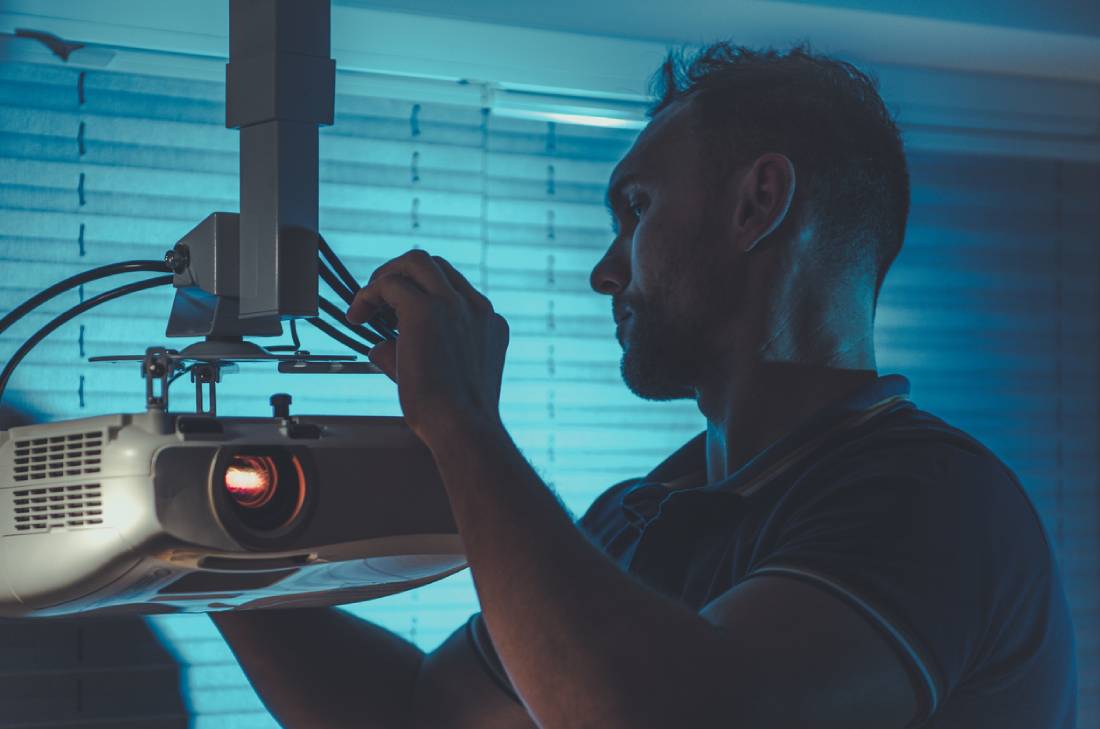
Common Challenges with AV System Installation

Audiovisual systems have become essential in a variety of settings, such as boardrooms, conference centers, home theaters, and even classrooms. The installation of an AV system can be challenging, especially for those who lack extensive technical knowledge. Whether you are new to the nuances of audiovisual technology or not, it is vital to get your system components from an audiovisual technology supplier you can trust. They can help you understand the common problems that arise during installation to prevent pitfalls and ensure a smooth, problem-free set-up process. Here are some of the common challenges in AV system installation.

Common Challenges in AV System Installation

System Compatibility and Integration Issues

Modern AV systems are composed of different devices or components working together to provide the user with the audio and visual experience that they expect from their system. One of the challenges lies in ensuring that these individual components work together smoothly and seamlessly.

How to Solve:

Select your equipment correctly. Research ahead of time and purchase equipment that is known to work well together. Manufacturers nowadays offer comprehensive systems with components that are designed to work together. Plan well and ensure that each part is verified during the design stage to save time, effort, and money during installation.

Network and Bandwidth Limitations

Network requirements have surged as more and more systems depend on IP-based communication. When network bandwidth is insufficient, or network configuration is inadequate, it can lead to a lag, loss of quality, or sometimes complete failure of AV signals.

How to Solve:

Work with IT professionals to ensure that the network can handle the additional AV load. It is essential to have your network assessed. Have a professional evaluate your bandwidth, router quality, and security protocols, especially when the system will be used for streaming or video conferencing.

Power Supply and Cabling Challenges

Inappropriate cables and insufficient power planning can cause unforeseen delays and reduced system performance. Ensure proper power sources and use the suitable cable for safety and excellent AV performance.

How to Solve:

Plan your cables and power requirements early on. Use high-quality cables with appropriate ratings and shielding if you want to reduce signal degradation over long distances. Power conditioning devices can help avoid fluctuating power or interference.

Acoustic or Lighting Problems

If the lighting and acoustics in the room are poor or less than what is ideal, this may lead to echo, ambient noise, glare, and other screen visibility and auditory concerns.

How to Solve:

Invest in sound-absorbing panels and carpeting. Consider the placement of screens and lighting sources. Reposition them if necessary. Make use of anti-glare screens and adjustable lighting fixtures. Conduct an assessment of the acoustics and lighting of the space before you install your system to identify possible issues.

User Interface Complexity

An overly complex system may be a challenge for the end user to operate. Multiple remote controls, control panels, and unfriendly software can cause frustration and increase the need for additional support.

How to Solve:

Consolidate the controls into one remote to simplify the experience. Attend hands-on training that allows users to familiarize themselves with the system and become comfortable with the basic operations.

Data Privacy Concerns

With the increasing interconnectivity of devices, security, and data privacy have become reasonable concerns. Hackers may try to enter the AV systems to steal valuable data or cause disruptions to meetings.

How to Solve:

Close collaboration with your IT team is essential. Implement security best practices, like asking them to conduct regular security audits on all networked devices and making sure the software is up to date.

AV Systems Manufacturers

AV system installation requires careful planning, technical know-how, and collaboration with other teams in your organization. By identifying possible problems and issues early on, you can create an AV system that is efficient, secure, and easy to use. If you want to enhance your AV system with efficient, high-quality components—such as audio converters or splitters—you can trust Kanex Pro to offer you a range of solutions that will enhance your system. Explore their site today.

concept for benefits of upgrading old AV systems

Benefits of Upgrading Old AV Systems

More than ever, technology plays a pivotal role in different areas of people’s day-to-day existence, such as communications and productivity. For this reason, upgrading outdated AV systems is an important and valuable investment for any business organization. In any setting, be it corporate, school, or home, a modern AV system from a reliable and trustworthy AV systems manufacturer can bring notable improvements over old, outdated ones. Read on if you want to explore the key benefits of upgrading old AV systems.

Benefits of Upgrading Old AV Systems

Enhanced Audio and Visual Quality

Old AV systems will no longer provide a satisfying experience due to blurry visuals, distorted audio, or low-resolution outputs. Meanwhile, upgrading to a high-definition AV system ensures clearer business presentations, sharper video calls, and crisper sound quality. High-quality visuals and audio can create a significant difference, especially where communication and collaborations are of much importance. In the business setting, the quality of your AV can lead to more effective meetings and successful presentations. When it comes to the school setting, it can provide your students with a more enjoyable and immersive learning experience.

Increased Reliability and Decreased Downtime

Older setups are not as reliable as modern setups. Using outdated AV equipment means exposing yourself to higher risks of malfunctions, interruptions, or even complete failures. This may result in downtime that affects your productivity. 

Compared to outdated setups, modern ones are more durable and come with features like self-diagnosing software and remote troubleshooting capabilities. This minimizes the need for frequent maintenance and allows your organization to save valuable time, effort, and money. In addition, employees can focus on more important tasks rather than maintenance issues.

Seamless Integration with Modern Technology

One of the biggest concerns with using old AV equipment is its compatibility with new or modern equipment. It is a big frustration when users find out too late that their AV system cannot be integrated with current devices, platforms, or software, making it a challenge to work with other systems and technology that your organization relies on. An upgraded AV system allows you to work with other devices like smartphones, tablets, computers, and operating systems and platforms without a hitch. This gives the users a more streamlined and flexible user experience.

Improved User Experience and Flexibility

Modern AV systems are easier to operate, even for those who are not technically inclined. This is because they are designed with user-friendly interfaces. Voice control capabilities, touch screens, and wireless connectivity are growing more common in modern AV systems. As a result, users of all skill levels can use them without a problem. Employees with no technical background can set up or modify AV settings without calling the IT department. Meanwhile, in educational institutions, teachers and students are empowered to use AV resources without any complicated setups.

Energy Efficiency and Reduced Environmental Impact

Designed with energy efficiency in mind, modern systems use less power than outdated systems, resulting in lower energy costs. The use of eco-friendly materials in designs contributes to sustainability efforts, which organizations that advocate for the environment can find appealing.

Future Proofed

Because of the fast evolution of technology, users should always be prepared and future-proof their devices without having to buy a new one every time there is a technological change. Modern AV systems are designed to be adaptable and scalable, which allows users to expand their AV capabilities as needed. Whether you are adding more displays, connecting to an additional device, or integrating new software, a modern AV system is flexible and can evolve with your needs. By using a future-proofed system, you can ensure that your system can adapt to future technological advancements.

Enhanced Collaboration and Network

Modern AV systems make screen sharing and video calls, regardless of location and time zones, easy, making hybrid, remote work, and remote study setups no longer a challenge.

Invest in a New AV System Today

Upgrading your AV system is a wise investment. It supports engagement, collaboration, and productivity, reduces costs, improves your visual and audio, and provides a more immersive experience. These are just some of the benefits of upgrading to a more modern setup. Check out new audio-visual products here.

Featured image for What Is the Difference Between HDMI and USB

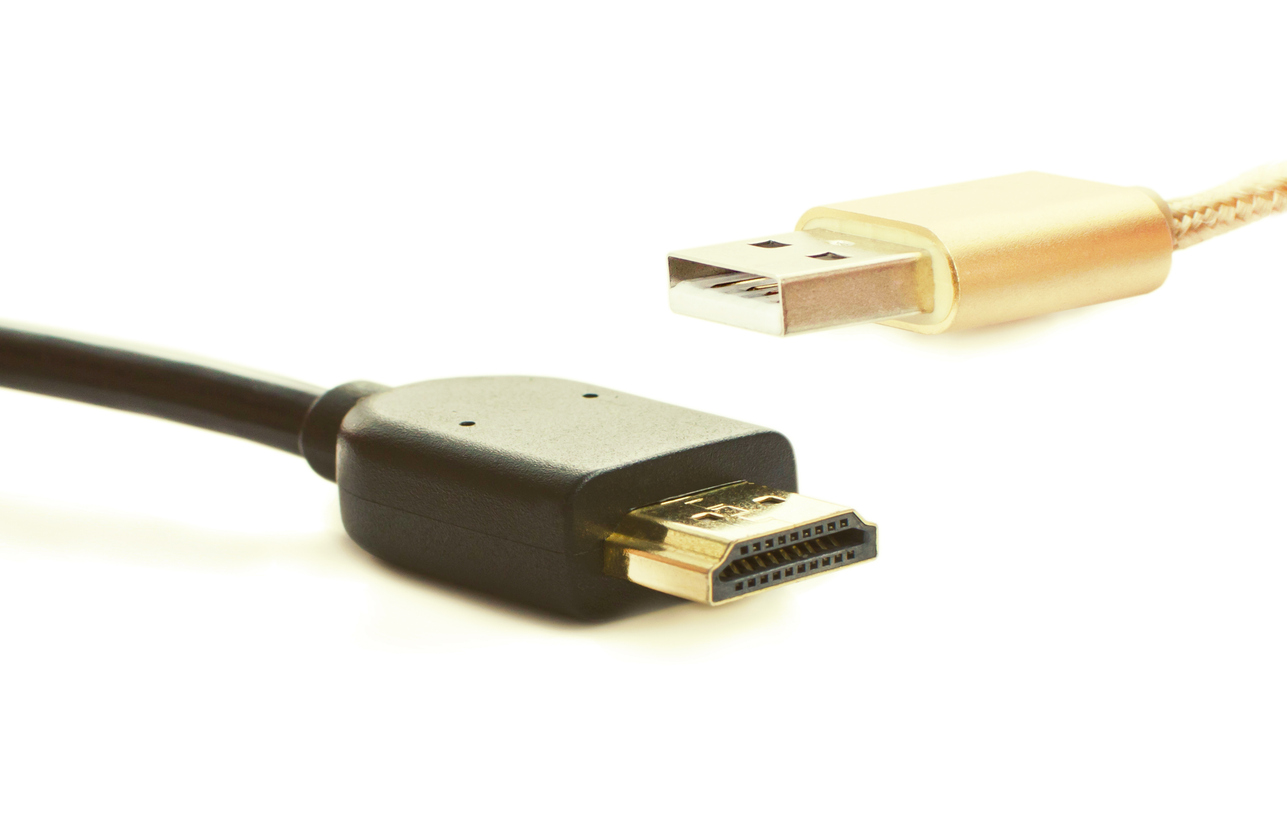
What Is the Difference Between HDMI and USB?

Connecting our devices— whether they are computers, TVs, or smartphones—to external screens or storage devices, has become more and more necessary for work and for people’s personal or household entertainment. HDMI (High Definition Multimedia Interface) and USB (Universal Serial Bus) are two of the most popular and commonly used connectors for this purpose. Though they are both extremely popular, many users do not know how to differentiate one from the other. Many users have most likely wondered what the difference between HDMI and USB is. If you are one such user, here is a breakdown of the functions, capabilities, and optimal uses of each connector. Understanding the differences will help you determine when to use them or which one to get when you are selecting your AV products.

What Is the Difference Between HDMI and USB?

Purpose and Function

HDMI is today’s standard when connecting computers, laptops, and other gadgets to televisions to transmit high-quality audio and video signals. Its simplicity allows anyone to quickly connect two devices via the cable.

First released in 2002 and having undergone several updates, HDMI has become the go-to for connecting video game consoles, Blu-ray players, TVs, and computer monitors. Its ability to carry both uncompressed audio and video signals ensures high-quality output, whether in home entertainment or professional setups.

Meanwhile, USB is a connector initially designed for data transfers between computers and peripherals such as keyboards, printers, etc. Throughout the years, USB has been further developed to support other functions such as charging devices, transferring high-speed data, and even delivering power.

Audio and Video Capabilities

HDMI is perfect for applications where high-quality media output is a must. The evolution of HDMI has allowed it to support higher resolutions, even up to 8K, surround sound formats, and High Dynamic Range. For instance, HDMI 2.1 supports Ultra High Definition resolutions and refresh rates of 120 Hz, which makes it perfect for gaming, home theater, and other entertainment setups.

On the other hand, USB was not designed for video output. However, its evolution has allowed USB-C to support video output through specific protocols that enable users to connect particular laptops and smartphones to external monitors. However, when it comes to handling audio and video, users will be better off with an HDMI.

Data Transfer and Power Delivery

When it comes to data and power delivery, USB is unrivaled. USB 3.1 and 3.2 are excellent when connecting hard drives and SSDs because their transfer speeds can go from 10-20 Gbps. In addition, USB-C has no problem charging laptops, smartphones, and other high-powered devices because it can deliver up to 100 watts of power.

Meanwhile, HDMI  does not handle files, documents, and other data files. Although it can offer some power delivery of around five bolts, it is minimal and generally only supports small device functions.

Compatibility and Convenience

USB is versatile, and there is no problem with compatibility. With USB-A to USB-C, there are ports on almost all devices, from computers to cameras. Being able to use one connector for multiple devices allows for easy setup without complicated configurations.

Although a must for video and audio connectivity, HDMI is not as universal as USB. While it is true that HDMI ports are common on TVs, monitors, and other multimedia devices, HDMI cables offer less convenience when it comes to cable management due to the rigidity and size of the cables as compared to USB.

Get the Right Connector Today

Ultimately, your choice between HDMI and USB will depend on your intended use or purpose. If you want specialized support for multimedia content, HDMI is the perfect choice. But if you need a tool for data transfer, device charging, or connection to peripheral hardware, your best choice is USB. Contact the team at Kanex Pro representatives for help determining which connector better suits your needs.

Featured image for Key Types of AV Equipment for Gaming

Key Types of AV Equipment for Gaming

Video games have come a long way from unwieldy arcade games sitting in the corner of the local pizza shop. Game streaming can be a full-time (and lucrative) job. But you need the right gaming technology to keep your sessions up with the competition. Below, we cover the key types of AV equipment for gaming.

Key Types of AV Equipment for Gaming

We will skip over the consoles and controllers. You likely already know what basics you need, but what do you need to take your sessions to the next level? This guide will specifically focus on the types of AV equipment that are best for streaming video games.

Headphones

Quality headphones can transform a game. Wired headphones technically provide the best sound. However, wireless Bluetooth headphones provide more freedom of movement and experience. 

Capture Device

Video gaming can lead to candid cinematic moments. But without a capture device, they will come and go, just like they never happened. Most consoles have some built-in capture software, but it is rarely high quality. A capture device can store your gaming content in a designated storage device in real time. It will let you enshrine some of your most epic gaming moments in stone (or silicone).

Microphone

We wish you luck at this stage. Finding the best gaming microphone can often feel like trying to find the right car. There are many variables to consider that most people are not even aware of. The good news is there is something for every budget level. We recommend you look for something in your budget that fits the style you want, stand microphone versus wearable, and your personal aesthetic.

Lighting

Lighting can make or break your streaming videos. One of the biggest mistakes people make when recording a stream for the first time is discounting how important lighting is.

Every situation will require slightly different lighting, and game streaming will require a moderate approach. The streamer should be clear and visible but not glowing or highlighted. Let the gameplay speak for itself.

Camera

With a camera, you get what you pay for. You might be able to find cheap cameras that claim to be 1080p or even 4K, but if they have a price tag under $100, it likely is too good to be true.

That said, starting with something cheaper is not always a bad idea. As mentioned above, the gameplay is the core experience, and most streamers have only a small partition of the stream screen dedicated to video of them. Lower-quality cameras will not be as significant of an issue as a low-quality microphone or capture service.

Cables, Adapters, Extenders

Gaming can require a variety of cables, plugs, and prongs. Not every device will have a slot for what is needed. When setting up your gaming station, check to see if everything can be plugged into where it needs to be. 

Adapters

While you can always get adapters, it is better to plug devices in directly because each adapter offers a new place for something to get unplugged or go wrong. For example, if your computer only has USB-C slots, avoid purchasing anything that uses a USB-3 cord so you can bypass the need for an adapter. Adapters are a helpful tool, but they are best reserved for when you have no other option.

Extenders

In general, when you have a lot of things to plug in, using a surge protector power strip is usually a good idea. Not only can it help keep all your cables organized, but it also improves electrical safety. Blowing a fuse at the wrong moment is never good.

Cables

If you are working with consoles, the cables included with the console tend to prove sufficient. The latest-gen consoles come with quality HDMI cables and power supply cords. Still, you can upgrade your cables if you want some extra length or durability.

In any case, make sure you organize your cables well. Tripping over them or unplugging something in the middle of a boss fight can quickly ruin the mood.

Top Source for AV Equipment for Gaming

Kanex Pro is a leading audio-visual equipment retailer for customers who want the best. Expect premium materials, cutting-edge tech, and top-tier customer support.

concept for audio recording best practices

Audio Recording Best Practices

Technological advances have made people’s standards higher, especially when it comes to audio and video recording. When it comes to audio, people expect it to be clear. Whether it’s a YouTube video podcast, a music video, a commercial, or an online conference, your audio quality should be spot on. Today’s audience has a very short attention span, and if your audio quality is poor, you will not get their attention. You will most likely lose them to the thousands of other creators who create the same content as yours. Needless to say, if you are a podcaster, a music video producer, a voiceover talent, or anyone who creates audio content for a living or even as a hobby, high-quality audio recording is paramount to creating content that resonates with your audience. On the contrary, poor audio will seem unprofessional and cause your listeners to tune out. The good news is through the help of affordable audio-visual technology and by applying a few audio recording best practices, you can significantly improve the quality of your audio recording regardless of your budget or experience level. 

Audio Recording Best Practices

Choose the Right Microphone

You probably know that microphones play a significant role in the quality of your recordings. Orient yourself with the types of microphones available to you and choose the one that suits your particular situation best. Two of the most common types of microphones are the dynamic type and the condenser type.

Dynamic Microphones

If you are a live performer or a producer of live performances, this type is an ideal choice for you. These microphones are more rugged and better suited for use in noisy environments. They have no problem handling louder sounds but are not sensitive enough to capture fine details.

Condenser Microphones

These microphones are more sensitive and perfect for studio recordings. They are designed to capture a broader range of frequencies. This results in crisp and clear sound. However, care should be applied because they may pick up unwanted background noise if they are used in an uncontrolled environment.

Control Your Environment

It is essential to control your environment if you want to achieve a clean sound. Here are some tips to minimize background noise and echo.

Soundproofing

If you want to improve the audio quality of your recording:

  1. Record in a quiet, acoustically treated room.
  2. If your budget or location makes a professional studio impossible, use foam panels, blankets, or pillows to absorb sound reflections in your space.
  3. If you are recording at home, use the smallest room you have. You can use your closet if you want, as long as it allows you to have a comfortable setup.

Reduce Background Noise

Choose the right time to record your audio. Ambient noise can be frustrating. Record at a time when background external noise like traffic is minimal. Turn off fans, air conditioning, and other electronics that may create humming or buzzing sounds in the background.

Microphone Placement

Strategic positioning of your microphone is a must. Place it about 6 to 8 inches away from your mouth. If you are too close, you run the risk of recording unwanted pops and breaths. Meanwhile, if you are too far away, this will result in thin and distant sound.

Monitor Your Levels

One big mistake you can make while recording is not being fully aware of your levels. Recording too quietly will result in noise when you amplify the sound later. Meanwhile, recording too loudly will result in distortion.

Adjust Gain

Gain is what you call the input volume of the microphone. Set your gain so that the loudest part of your recording does not peak on your audio meter. However, make sure that it is loud enough to avoid background noise. Ensure that the meter stays on green and just touches yellow during the loud moments of the recording.

Depending on your setup, using audio converters and mixers allows you to regulate these levels and maintain the sound clarity you are aiming for.

Use a Headphone Monitor

Monitor your recording in real time using a headphone monitor. This will help you catch problems before they even become a major problem. Listening to the live feed of your recording gives you the chance to address issues like background noise or voice distortion early on.

Post-Recording Management

Sometimes, no matter what you do, background noise is inevitable. Post-production techniques can help you clean it up.

Programs like Adobe Audition and Audacity allow you to remove low-level background noise like hums, hisses, or distant traffic sounds. 

EQ, or Equalization, can remove unwanted frequencies and help balance your audio. 

Compression is key to ensuring consistent volume levels, preventing loud sounds from becoming overwhelming, and making quiet sounds be heard.

Make sure that you edit out mistakes, awkward pauses, and filler words like “uh” and “um” to keep the recording sound professional.

Prepare Your Voice

Remember that your voice is your primary and most important instrument. Even if you have the best and most expensive equipment, if you do not have the right instrument, then your recording will be a complete failure. Nobody wants to listen to a voice that does not have any life.

Be conscious of your posture. Sit up straight while you speak to ensure that you will be speaking with your best voice.

Do some light vocal warm-ups before recording. This will help you relax your vocal cords and help you enunciate better. Practice saying your message in the tone you want to say it. Drink plenty of water before recording, and keep a glass of water nearby to keep yourself hydrated during long recording sessions.

Get the Professional Sound You Want for Your Audio Recording Projects

You do not have to spend a fortune just to sound professional and have an audio record that your audience would love listening to. All you need to do is apply these best practices in your next project and ensure that you have the right equipment in your setup. If you are ready to take your next audio recording to the next level, explore our website today for the perfect equipment that will give you the best results.

Featured image for How to Elevate Teaching With In-Classroom Technology

How to Elevate Teaching with In-Classroom Technology

Schools and universities have become highly competitive in recent years. This is a direct response to the demands of students who are pressured to perform well academically to get a slot in prestigious educational institutions or land high-paying jobs. Technology has become a critical tool for enhancing teaching and learning experiences in this evolving educational landscape. By taking advantage of technological advancements, educators can improve their teaching methods, ensuring that students stay engaged and motivated and are more capable of grasping complex concepts. In these ways, in-classroom technology can elevate teaching practices.

How to Elevate Teaching with In-Classroom Technology

Today’s classrooms are far from the traditional classrooms of yesteryears with their blackboards and chalk. Classrooms now use interactive displays, digital resources, and other innovative tools that provide dynamic learning opportunities. Instead of carrying books and notebooks to school, many students today are only required to have a tablet PC to take notes and digital textbooks to read. One of the key advancements in this area is the integration of audiovisual solutions, which have become crucial for creating engaging and interactive learning environments. Read on for tips and strategies on how to elevate teaching with in-classroom technology.

Interactive Displays 

Current teachers are no longer limited to blackboards and whiteboards. Smartboards or digital projectors have transformed the way they present their lessons. These tools allow real-time interactions between the teacher, the content, and the students, making it possible for students to enjoy an engaging and fun learning experience.

The flexibility of interactive displays in using various media types, like videos, images, and presentations in lessons, makes them more appealing to different learning styles. They also support collaboration among students in solving problems and presenting their projects to the class. The mix of visuals, animations, and hands-on activities makes it easier for students to absorb concepts better.

Digital Assessments for Instant Feedback

Assessment is a crucial part of learning. It is the teacher’s way of knowing how much is being absorbed, the students’ readiness to move on to the next topic or skill, as well as the effectiveness of the teaching strategies used. 

With digital assessment tools such as online quizzes, polls, and other interactive platforms, teachers can gauge the level of the student’s comprehension in real time. These tools make assessment fun and engaging while offering immediate feedback to students and educators. This allows teachers to identify areas where students may be having difficulties, allowing them to provide timely intervention.

Gamification

Gamification, or the integration of games in education, is a proven effective way of motivating students. Various apps allow teachers to create educational games for their students to encourage friendly competition, collaboration, teamwork, and critical thinking.

This method transforms the classroom into a more interactive space where students can receive rewards for achieving academic milestones. It makes learning more fun and promotes better absorption and retention of information and concepts. 

Audiovisual Aids for Inclusive Learning

Technology for classrooms, such as audiovisual aids, has become a necessity. In addition to podcasts, speech-to-text technology, and audiobooks, there are many valuable resources for students with different learning preferences. Combining these with pictures and video lessons ensures the absorption of lessons for both visual and auditory learners. Those with hearing impairment can also benefit from captions and transcripts, while those with visual impairment can benefit from descriptive audio.

Kanex Pro’s Audiovisual Solutions

The integration of in-classroom has transformed and reshaped the traditional learning environment into something more engaging and dynamic. The advancement of technology has made it possible to not only increase student engagement but also create a learning environment that is more inclusive and more personalized. Through audiovisual aids, interactive displays, gamification, and digital assessments, educators have a lot of opportunities to meet the different needs of their students while making their teaching methods more creative and effective. 

As education continues to change, technology will play an even more significant role in shaping how students learn and how educators teach. The secret to getting the most from technology is its thoughtful and creative use while ensuring that it complements and supports traditional teaching methods.

If you want to transform your students’ learning experience, consult with us today.

Featured image for Where To Put Electrical Outlets in Your Home

Where to Put Electrical Outlets in Your Home

Designing or remodeling a home takes significant planning and contemplation. Every aspect of the design and decor matters. One often overlooked consideration is the placement of electrical outlets. Below, you will find where to put electrical outlets in your home.

Where to Put Electrical Outlets in Your Home

The placement of electrical outlets in your home is an important consideration. Depending on where you put them, they can make daily tasks much easier or harder. Consider the following guidance on where to put electrical outlets in your home.

Living Areas

Electrical outlets need to be placed around your general living area. Most electrical codes require outlets every 6 to 12 feet along the walls in the living areas, which are usually occupied with lamps, televisions, and phone chargers.

Having enough outlets ensures that you do not need to rely on extension cords to power your devices. Electrical outlets near your entertainment center are necessary. Be sure to install several outlets to optimize your entertainment setup and audio-visual solutions. For those with an open layout, consider floor outlets in places where you would have put wall outlets.

Kitchen

The kitchen is a hotspot for traffic. It is where you prepare food and gather to eat. Having enough outlets in this area is critical for your ease of food preparation. Outlets need to be placed above the countertops, on kitchen islands, and around high-current appliances. For every four feet of countertop space, place an outlet on the wall. Such placement will ensure you have options of where to place your appliances, and you can choose the most convenient location without wondering if there is an outlet nearby.

Installing outlets on the sides of a kitchen island is also helpful in various situations. You will need to be strategic about your outlet placement, considering your kitchen setup and most trafficked areas. Large appliances should also have electrical outlets behind them. Due to the higher voltage needs, you will likely need a specialized outlet.

Bedrooms

Bedrooms have significantly more technology than they did in the past. People often spend time on their phones at night and watch television. If you have considerable screentime while in your bedroom, place electrical outlets near your bed and nightstand. These outlets will also service your alarm clock and other devices to ensure they are fully charged in the morning. Depending on the number of devices you charge or use daily in your bedroom, you may benefit from creating a charging command center in your bedroom. Adding a USB wall plate can also be extremely beneficial if you have a lot of devices.

If you have an additional entertainment center in your room, be sure to add electrical outlets around it. The placement of the electrical outlets will depend on what type of entertainment system you have. Deciding the placement is typically easier when the entertainment center uses shelving. Still, many people opt to hang their televisions and find other aesthetically pleasing ways of connecting them to power. Be sure to assess your potential setup prior to installation to ensure your outlets are in the right place.

Bathrooms

The bathroom is another hotspot in the home. As a space to wind down at night and get ready in the morning, it gets a lot of traction. That said, it is important to use extreme caution when placing electrical outlets in the bathroom. The presence of water near the outlets can be hazardous. Place electrical outlets near the vanity area, as they can be used for electric razors, hair dryers, and curling irons, but be sure they are high enough from the basin to avoid splashing.

Avoid putting outlets near bathtubs or showers. This is a major hazard and can result in severe damage to both your home and its occupants. Be sure to refer to the local electrical codes for guidance. Outlets in the bathroom should also be equipped with Ground Fault Circuit Interrupters for added safety. Work with a skilled electrician to ensure your setup is safe.

Audio-Visual Solutions

Check out the selection of products at Kanex Pro for any of your audio-visual solutions!